It’s a heart-sinking moment: a favourite necklace catches on something and snaps. But don't just toss it in a drawer to be forgotten. Many common breaks—like a clasp that won’t stay closed or a chain that’s pulled loose from its end—are surprisingly straightforward to fix at home with just a few basic tools. This guide will walk you through how to fix a broken chain necklace yourself, saving a treasured piece from the scrap heap.
From Broken to Beautiful: Your Guide to Necklace Repair
Before you reach for the pliers, it's crucial to understand exactly what you're dealing with. A broken chain isn't just a nuisance; it’s a symptom of wear and tear that needs the right touch to make it strong again.
Jumping in without a plan can easily make things worse, turning a simple fix into a costly trip to the jeweller. Think of this guide as your first step to confidently rescuing your jewellery.
We’ll cover the essentials for assessing the damage and applying the right techniques for different types of breaks. You'll learn how to tackle common problems, including:
- Re-securing a chain that has slipped out of its jump ring.
- Carefully removing a damaged link without compromising the chain's integrity.
- Replacing a worn-out clasp that no longer closes securely.
Why Bother with a Repair?
Choosing to repair a piece of jewellery is about more than just saving money; it’s a way to preserve sentimental value and make a sustainable choice. And you’re not alone. Over 80% of UK adults have owned broken jewellery at some point, which has helped create a robust repair industry that’s set to grow. You can read more about the rise of repair services in this UK market report.
A successful repair does more than just mend a piece of metal—it restores the memories and personal story attached to your necklace. It’s about bringing a cherished accessory back into your daily life.
By learning a few basic skills, you empower yourself to look after your entire collection. Not only will you save money, but you’ll also gain a deeper appreciation for the craftsmanship of each piece. This guide will give you the practical know-how to decide whether a fix is within your grasp or if it’s time to call in a professional for more delicate work.
Quick Assessment of Your Broken Chain
Before you get started, take a moment to look closely at the break. Identifying the problem is half the battle and will help you decide whether to DIY or call a pro.
| Type of Break | Common Cause | DIY Feasibility | Typical Solution |
|---|---|---|---|
| Open Jump Ring | A snag or gentle, persistent pulling. | High | Closing the ring securely with two pairs of pliers. |
| Broken Clasp | Spring mechanism failure or metal fatigue. | Medium | The clasp can often be replaced entirely. |
| Snapped Link | A sudden, sharp tug or a weak point in the chain. | Low to Medium | Requires soldering or professional link removal/replacement. |
| Chain End Detached | The final link has pulled free from the end cap. | Medium | Can sometimes be re-secured or may need soldering. |
This table should give you a clear idea of what you’re up against. For simple jump ring or clasp issues, you’re likely in good shape for a home repair. If the chain itself has snapped clean through, it might be a job best left to an expert.
Gathering Your Essential Repair Kit
Trying to fix a delicate chain without the right tools is a recipe for frustration. A simple repair can quickly become a mangled mess. Before you dive in, let's get a basic toolkit sorted. You don’t need a full jeweller's workbench, just a few key items to handle the job with precision.
The absolute non-negotiables are two pairs of needle-nose pliers. Why two? Because it gives you total control. You can grip a tiny link or jump ring securely from both sides, letting you open or close it without applying brute force that could scratch or warp the metal. Fine-tip tweezers are just as crucial for picking up and placing those fiddly little components.
This sketch shows the core tools you'll need for most basic home jewellery repairs.
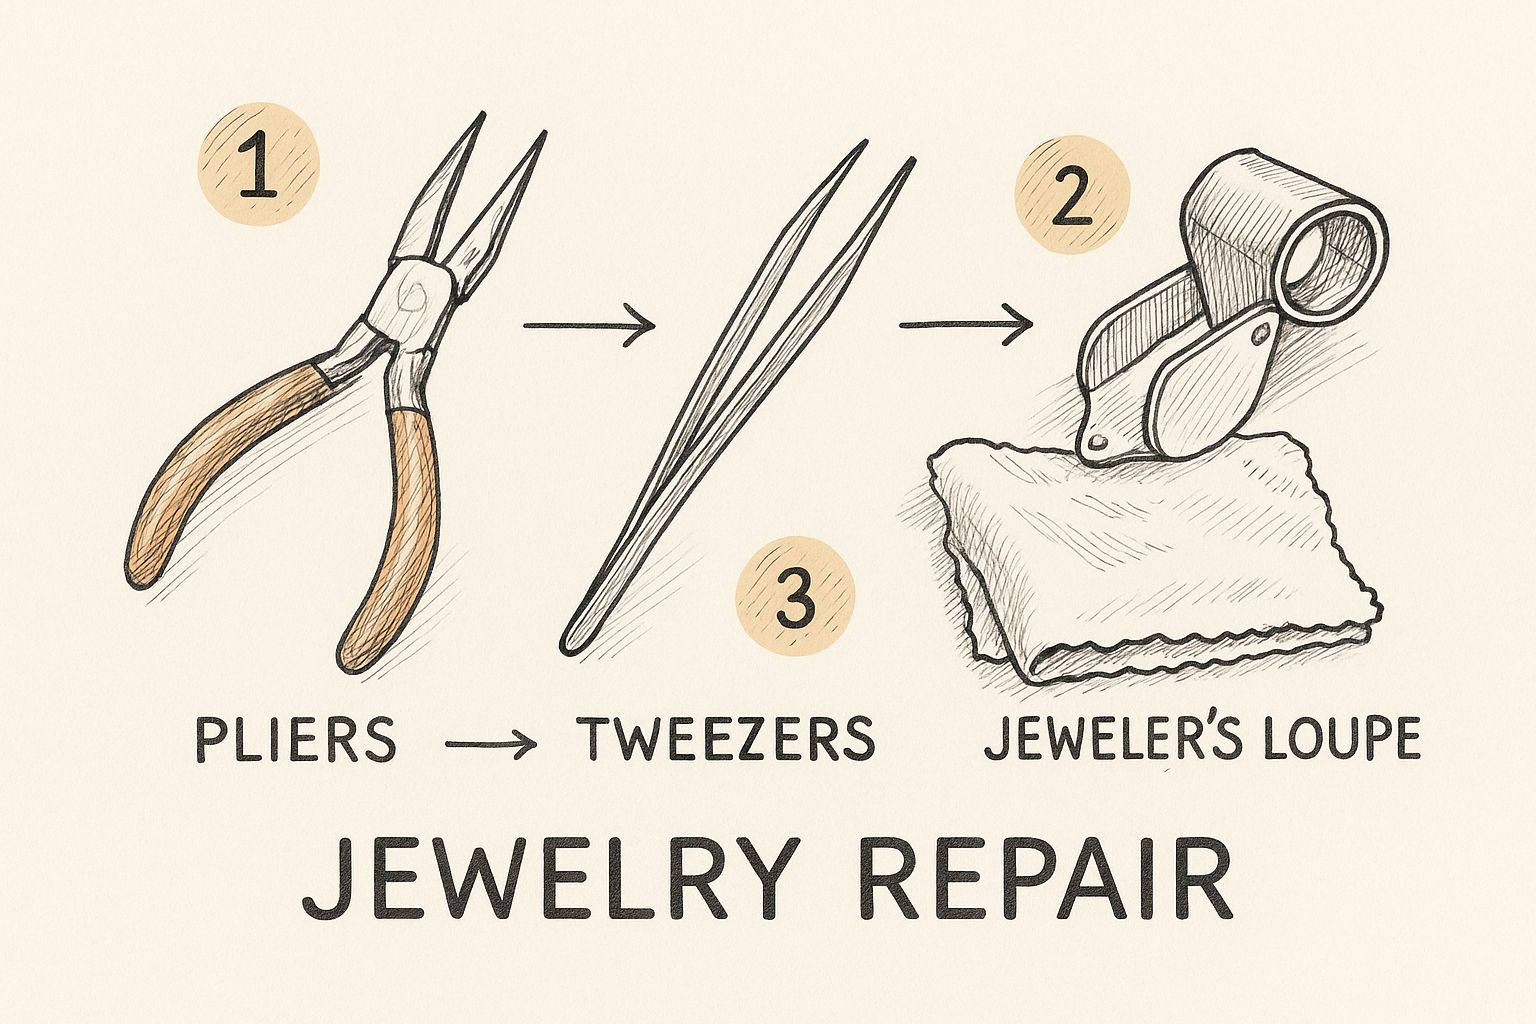
As you can see, with just a few simple items, you're well-equipped for the most common necklace fixes.
Helpful Additions for Your Kit
To make the work even easier on your eyes, think about adding a jeweller’s loupe or even a simple magnifying glass. It’s a game-changer for seeing fine details clearly, especially when you're checking for those tiny gaps in closed links. A soft microfibre cloth is also a great idea for protecting your work surface and stopping the necklace from sliding about.
Pro Tip: You can often find affordable plier sets at craft shops or online. Look for ones with smooth, non-serrated jaws to avoid marking the soft metal of your jewellery.
Having the right tools is the first step, but keeping your jewellery in top condition is an ongoing job. For more on that, take a look at our guide on professional jewellery maintenance.
Mastering the Open Jump Ring Fix
If your necklace has suddenly dropped off your neck, nine times out of ten the culprit is a pulled-open jump ring. It’s that tiny, unsoldered metal circle connecting the clasp to the chain—and luckily, it’s one of the simplest fixes you can do yourself. Getting this right is a great first step into the world of jewellery repair.

Here's the single most important rule to remember: never pull the ends of the jump ring straight apart. I can't stress this enough. Forcing it open like a C will warp its circular shape, weaken the metal, and make it almost impossible to get a secure closure ever again. A misshapen ring is a weak ring, and it's just waiting to fail on you.
The Correct Twisting Technique
The professional method is all about a gentle twisting motion that preserves the ring’s strength and shape. To do this, you’ll need two pairs of needle-nose or chain-nose pliers.
First, get a firm grip. Hold one side of the jump ring with one pair of pliers, placing the jaws around the 9 o'clock position. Then, take your second pair and grip the other side, right at the 3 o'clock mark. You want the split in the ring to be sitting right at the top, at 12 o'clock.
Now, instead of pulling, you're going to twist. Gently push one hand forward while you pull the other back, opening the ring sideways. This creates a clean gap without ruining its roundness.
Pro Tip: Less is more here. You only need to open the ring just wide enough to slip the end link of your chain or the loop of the clasp back on. Over-twisting can still stress the metal.
Once the chain is back in place, you just reverse the motion. Twist the ends back together until they meet perfectly. The goal is to make them completely flush. A good way to check is to run your fingernail over the join; if you feel a bump or a gap, it’s not closed properly.
A tight, secure closure is everything. Even a tiny gap can catch on a jumper and pull the whole thing open again, or worse, let the chain slip right through. Give the ring a little wiggle with your pliers to make sure the ends are perfectly aligned and pressed firmly together. It's this small detail that makes all the difference between a temporary patch-up and a lasting, reliable repair.
Tackling a Broken Link in the Chain
A break in the middle of the chain can feel a lot more daunting than a dodgy clasp, but it’s usually a repair you can handle yourself. All it really takes is a bit of patience and a steady hand. Depending on the chain’s style, you have a couple of solid options here.
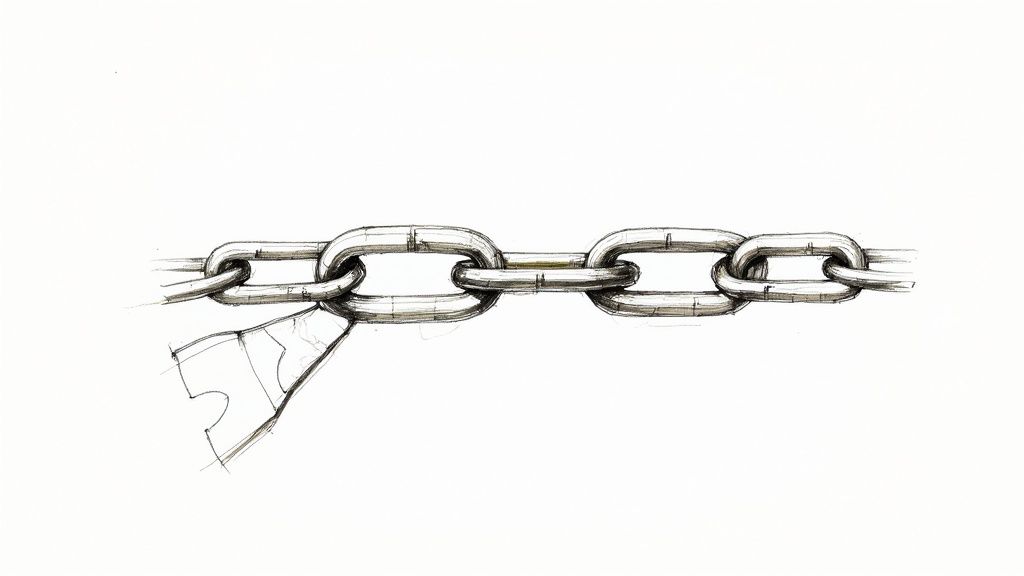
The first, and often simplest, approach is to just remove the broken link and connect the two healthy links on either side. This method gives you an incredibly secure fix, but it does come with one small trade-off: your necklace will be a fraction shorter. For most chains, this tiny change is completely unnoticeable, making it the quickest and strongest solution.
Removing the Damaged Link
To get this done, you’ll need to gently open one of the links right next to the broken one. Using your two pairs of pliers, get a firm grip and use that same twisting motion we talked about earlier—remember, never pull the link apart. Once it's open, you can unhook the broken piece and set it aside.
From there, just thread the open link through its counterpart on the other side of the break and twist it securely shut. Run your finger over the join to make sure the ends are perfectly flush; you don't want any snags.
Adding a New Jump Ring
But what if you can't afford to lose even a millimetre of length? This is where your second option comes in: introducing a new jump ring to act as a replacement link. It keeps the original length, which is perfect for chains where every bit counts.
The real challenge here is finding a jump ring that’s a perfect match for your chain.
You need to match the new ring to the original in three key areas:
- Metal Type: Never mix your metals. It can lead to discolouration or even cause an allergic reaction down the line. Keep sterling silver with silver, and gold with gold.
- Colour: Gold comes in countless shades (yellow, white, rose), so get as close a match as you can visually.
- Size and Gauge: For the repair to be seamless, the new ring needs to have a similar thickness and diameter to the original links.
Once you've sourced the right jump ring, the process is dead simple. Open the new ring with the twisting method, hook it onto both ends of the broken chain, and twist it closed until the seam is practically invisible.
A word of caution: for very fine, intricate, or valuable chains like snake or rope chains, this kind of repair can be especially tricky. If the break is complex or you're working with precious metal, getting a professional opinion is always the wisest move. For those situations, you can learn more about our expert jewellery restoration services.
Replacing a Faulty or Broken Clasp
Sometimes the chain itself is perfectly sound, but the clasp has given up the ghost. A worn-out or snapped clasp isn't just an annoyance; it's a disaster waiting to happen. You can't wear the piece, and if you try, you risk losing it for good. Learning to swap one out is a fantastic skill that adds security and new life to your jewellery.
You’ll commonly find spring-loaded bolt rings or the sturdier lobster clasps on most necklaces. If your original clasp felt a bit flimsy, now’s your chance for an upgrade. A quality replacement is a tiny investment that protects a piece you love from being lost forever.
The actual process is pretty straightforward, especially since it uses the same techniques we’ve already covered. You’ll need two pairs of pliers to gently twist open the jump rings connecting the old, broken clasp to the chain.
Attaching the New Clasp
With the old parts out of the way, it's time to bring in the new.
- Grab your new clasp. Using your pliers, carefully twist open the small jump ring that's either already attached to it or the one you've chosen to use.
- Hook that open ring through the very last link on one side of your necklace.
- Now, securely twist the jump ring closed. The key here is to make sure the two ends meet perfectly flush, with no gap.
All that's left is to do the same for the other side. Attach a new, strong jump ring (or the end ring that came with your clasp set) to the other end of the chain, and you're done.
The desire to repair rather than replace is becoming more and more common, fitting into a broader shift towards sustainability. It’s telling that even with the rise of online shopping, traditional jewellers still hold 86.2% of the market share in the UK. This really highlights how much we value skilled, hands-on craftsmanship and repairs. You can find more UK jewellery market trends on grandviewresearch.com.
Knowing When to See a Professional
Learning to fix a broken chain is a great skill, but it’s crucial to know when to put the tools down. Some repairs demand a level of precision and specialised equipment that only a professional has. Getting it wrong risks permanently damaging a sentimental or valuable piece.
Certain situations are clear red flags. Intricate chains, like delicate snake, rope, or herringbone styles, are notoriously difficult to mend without leaving visible kinks or creating a new weak spot. Any break that requires soldering—fusing metal with heat—is firmly in professional territory. This is especially true for precious metals like platinum or gold.
When to Step Away from the Pliers
You should always seek expert help in these scenarios:
- Gemstones Are Nearby: The intense heat from soldering can easily damage or discolour stones. It’s a costly mistake you don’t want to make.
- The Chain is Hollow: These chains are lightweight but can be crushed by pliers, turning a simple fix into an impossible one.
- The Piece is an Antique: Vintage jewellery often uses unique alloys and construction methods that need a specialist's touch to preserve its integrity.
Ultimately, if the thought of tackling the repair fills you with more anxiety than confidence, that’s your sign. Trust a professional. A jeweller has the right tools and years of experience to guarantee a seamless, strong, and lasting fix.
The UK's jewellery repair market is highly competitive, with skilled independent shops offering fantastic service. A straightforward soldering job might only cost £15–£30, while more complex restorations can exceed £100—a small price for preserving a cherished item. You can explore more about the UK's jewellery repair industry on ibisworld.com.
For a trusted local service, learn more about our professional jewellery repairs right here in Hatton Garden.
A Few Common Questions About Necklace Repair
Even with the best guide, it’s natural to have a few questions before you start tinkering with a sentimental piece. Let’s tackle some of the queries we hear most often in the workshop.
A big one is always about super glue. Can you just use a dab of glue to fix a broken link? Please don't. Glue creates a weak, brittle bond that’s almost guaranteed to snap again. Worse, it makes a proper solder repair much harder (and more expensive) for a jeweller later, as all that dried-on residue has to be painstakingly cleaned off first.
How Much Should a Repair Cost?
The cost to get a necklace professionally fixed can vary quite a bit. For a simple job, like re-attaching a clasp or closing a jump ring, a local jeweller will likely charge around £10–£20.
If the break needs soldering on a gold or silver chain, you’re looking at something closer to £25 to £50. Intricate chains or complex repairs will cost more, so it's always smart to ask for a firm quote before they start the work.
The main takeaway? For any metal jewellery, a solid mechanical fix (like closing a jump ring properly) or a professional solder are the only solutions that will actually last.
What Is the Strongest Type of Clasp?
If you're replacing a broken clasp, you want something secure. Lobster clasps are probably the most popular choice for a reason—they're one of the strongest and most reliable options out there. That spring-loaded mechanism is very tough to open by accident.
For heavier necklaces, a box clasp is another fantastic, durable choice that offers great security.
At Opulence Jewellery Services, our Hatton Garden workshop handles everything from simple clasp replacements to complex soldering with precision and care. Bring your cherished pieces to us for an expert, while-you-wait repair. Learn more at https://www.opulencejewelleryservices.co.uk.