So, you’re looking to bring a chipped or faded piece of enamel jewellery back to life? Brilliant. For home repairs, your go-to material is a two-part epoxy resin, often sold as "cold enamel." It’s a modern and effective way to restore colour without needing the professional kiln used for traditional enamelling. The real secret to success lies in meticulous preparation of the metal surface before you even think about mixing the resin.
Understanding Enamel Before You Start
Before diving in, it’s crucial to know what you’re dealing with. In the jewellery world, "enamel" can mean two completely different things. Getting it wrong can lead to a disappointing mess or, worse, damage to a treasured item. One is a centuries-old art form; the other is a practical, modern fix.
Think of it this way: you find a stunning vintage brooch at an antique market, but a small chip in the vibrant blue detailing catches your eye. That original, glossy coating is almost certainly traditional vitreous enamel. Trying to replicate that fiery process at home is a non-starter, which is why understanding the difference is key to a successful repair.
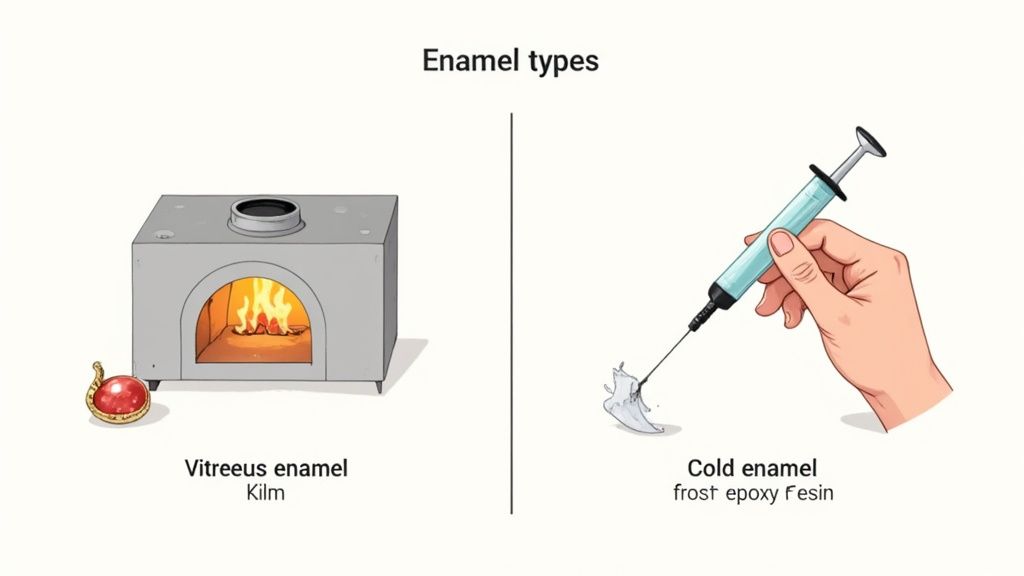
Traditional Vitreous Enamel: The Art of Fused Glass
Authentic, old-school enamel is essentially powdered glass that’s been fused onto metal with incredible heat, usually somewhere between 750°C and 850°C. This is done in a specialised kiln and creates that hard, luminous, and incredibly durable surface you see on high-end and antique pieces. It’s tough, resists scratches, and the colours have a depth that’s hard to beat.
However, this is strictly the domain of trained artisans and goldsmiths. Here’s why you can’t do it on your kitchen table:
- Serious Equipment: It demands a high-temperature kiln, proper ventilation, and a whole host of specialist tools for applying the fine glass powder.
- A Master's Skill: This isn't just a technique; it's an art. Controlling the heat and application to prevent cracking or melting the piece itself takes years of practice.
- Material Limits: Not all metals, and certainly not all gemstones, can survive the intense temperatures required for firing.
Cold Enamel: The Practical DIY Solution
This brings us to cold enamel, the hero of at-home jewellery repair. Despite the name, it isn't "enamel" in the traditional sense at all. It’s actually a two-part epoxy resin that cures at room temperature or with very low heat, completely sidestepping the need for a furnace.
This makes it the perfect choice for a DIYer looking to patch up a chip or restore colour. While it doesn't have the same glass-like hardness of its fired cousin, modern epoxy resins are impressively versatile and resilient. They cure to a glossy, colourful finish that can beautifully mimic the real thing—a fantastic solution for costume jewellery or for filling small chips on fine pieces where kiln-firing just isn't an option.
The core difference is simple: Vitreous enamel is melted glass, while cold enamel is a cured resin. For any home repair, you will always be using cold enamel.
To help you choose the right approach for your piece, here’s a quick comparison of the two methods.
Comparing Enamel Types For Jewellery Repair
| Feature | Vitreous Enamel (Kiln/Torch-Fired) | Cold Enamel (Epoxy Resin) |
|---|---|---|
| Material | Powdered glass | Two-part epoxy resin |
| Application | Fused with intense heat (750-850°C) | Mixed and applied at room temperature |
| Durability | Extremely hard, scratch-resistant, permanent | Good durability, but can scratch over time |
| Suitability | Best for high-end, new commissions | Ideal for repairs, costume jewellery, heat-sensitive pieces |
| Skill Level | Professional artisan/goldsmith | Beginner-friendly (DIY) |
| Equipment | Kiln, specialised tools, safety gear | Mixing pots, applicators, basic safety gear |
Ultimately, for any repair job outside of a professional workshop, cold enamel is not just the best choice—it's the only one. If you want to learn more about how professionals handle various jobs, you can dive deeper into the different kinds of enamel on jewellery.
Getting Your Cold Enamelling Kit Ready
The difference between a successful repair and a sticky, frustrating mess often comes down to one thing: preparation. Learning how to re-enamel jewellery is as much about having the right tools on hand before you start as it is about the application itself.
Think of it like cooking a great meal—you wouldn't start chopping without having all your ingredients ready. Fumbling for a toothpick while your epoxy is already starting to cure is a recipe for disaster. Let's walk through building the ideal kit, explaining the "why" behind each item.
Preparing The Jewellery Surface
The longevity of your new enamel depends almost entirely on how well you prep the metal. Your goal is to create a perfectly clean, slightly roughened surface that the cold enamel can grip onto for a permanent bond.
- Jeweller's Files: A set of fine-grit needle files is non-negotiable. You'll need them to carefully chip away any remaining flakes of old enamel and to smooth out the edges of the recessed area. This gives you a clean, crisp boundary for the new resin.
- Fine-Grit Abrasive: Use fine sandpaper or an abrasive block (around 400-600 grit) to gently scuff the metal base where the enamel will sit. This creates microscopic scratches, giving the epoxy a much better surface to key into. Don't press too hard; you're aiming for a dull finish, not deep gouges.
- Isopropyl Alcohol: This is your best friend for cleaning. A quick wipe with alcohol on a lint-free cloth removes any grease, dust, or oils from your fingers that could stop the enamel from bonding properly.
Mixing and Applying The Cold Enamel
This is where the magic happens. Having the right supplies here allows for precision and control, helping you avoid overfills, air bubbles, and uneven colour.
Once you mix the two parts of the epoxy resin, the clock starts ticking. Having everything laid out and within arm's reach is essential for a calm, controlled application.
The key ingredient, of course, is the cold enamel itself. You'll need a two-part epoxy resin made specifically for jewellery. Look for brands that offer good clarity, UV resistance (to prevent yellowing over time), and a viscosity that suits your project. A slightly thicker resin is often much easier for a beginner to control.
Here’s what you'll need to go with it:
- Mixing Pots: Small, disposable plastic or silicone cups are perfect for mixing the resin and hardener.
- Stirrers: Simple wooden coffee stirrers or craft sticks work perfectly. Just be sure to scrape the sides and bottom of the pot to get a completely consistent mix.
- Precision Applicators: You can get creative here. A standard toothpick is excellent for guiding tiny amounts of enamel into tight corners. For slightly larger areas, a blunted cocktail stick or even a fine-pointed artist's brush (which you'll likely have to discard after) can give you more control.
- Pigments: If you're matching a specific colour, you'll need resin-compatible pigments. They come in liquid or powder form. Always add a tiny amount at a time—it's far easier to darken a colour than it is to lighten it.
Setting Up a Safe and Tidy Workspace
Finally, your environment plays a massive role in the final quality of the repair. You need a space that is clean, stable, and safe to work in.
- A Well-Ventilated Area: While most modern jewellery resins have a low odour, they still release fumes. It's always best to work near an open window or in a room with good air circulation.
- Safety Gear: Always wear nitrile gloves. Epoxy resin can cause skin irritation, and this keeps your hands clean. Safety glasses are also a sensible precaution against any accidental splashes.
- A Level Surface: Your piece of jewellery must sit perfectly flat while the enamel cures. If it doesn't, the resin will pool on one side and create an uneven surface. Use a spirit level if you're not sure.
- Dust Cover: This is a pro tip that saves a lot of heartache. A simple overturned plastic container or Tupperware box placed over the piece while it cures protects it from dust, pet hair, and any other airborne bits that can ruin a perfect, glossy finish.
A Practical Walkthrough Of The Re-Enamelling Process
With your tools laid out and workspace prepped, it's time to get hands-on and bring your jewellery back to life. The real secret to learning how to re-enamel jewellery is patience. Rushing any of these stages is a surefire way to get a disappointing result, so take your time and be methodical.
To make this practical, let's walk through a common job: restoring the chipped black enamel on a sterling silver signet ring. This is a perfect starter project—it has a well-defined area and uses a single, solid colour.
Meticulous Surface Preparation
A lasting repair is built on a flawless foundation. Any speck of dust, grease, or old, flaky enamel will stop the new epoxy from gripping properly. The goal here is to create a perfectly clean, slightly keyed surface for the new enamel to bond to.
First, get a good look at the damage. Use a fine-tipped needle file or a dental pick to gently flake away any loose pieces of the original enamel. You want to be firm but careful—anything that isn't solidly attached has to go.
With the loose bits cleared, grab a small piece of fine-grit abrasive paper (400-600 grit is ideal) and gently scuff the metal inside the recess. You’re not trying to remove metal, just creating a micro-texture. This is a critical step; a mirror-smooth surface gives the epoxy nothing to hang on to.
Finally, the most important cleaning step: dip a cotton bud in isopropyl alcohol and thoroughly degrease the entire area. Swab it carefully, getting right into the corners. From this moment on, don't touch the prepared surface with your bare fingers. The oils from your skin are the enemy of good adhesion.
This process chart simplifies the core workflow for re-enamelling.
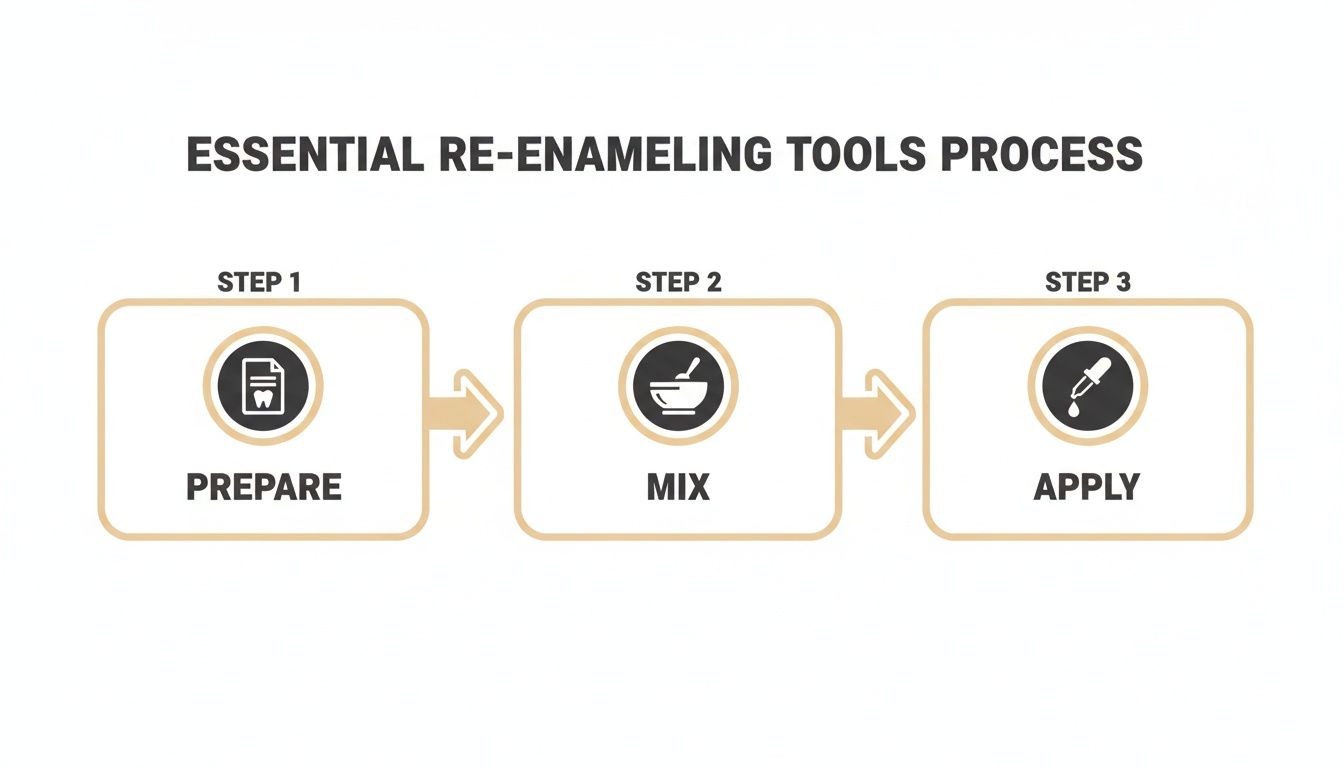
This visual guide shows that preparation, mixing, and application are the three pillars of a successful project, and each one needs the right tools and focus.
Colour Mixing and Matching
Matching an existing colour is more art than science. The golden rule is to start with less pigment than you think you need. It’s always far easier to darken a mix than it is to lighten it. For our signet ring, we're aiming for a solid, opaque black.
Squeeze out small, equal blobs of your two-part epoxy resin and hardener into a disposable pot. Using a wooden stirrer, mix them together thoroughly for the time stated on the packet—usually about one to two minutes. Be sure to scrape the sides and bottom of the pot to get everything fully combined. If you don't, you'll end up with soft spots that never cure.
Now for the pigment. If you’re using a powder, just dip the very tip of your stirrer in and add a tiny speck to the resin. For liquids, add a single small drop. Mix it in completely before you judge the colour. Keep adding tiny amounts until you hit that deep, opaque black.
Pro Tip: Before you touch the ring, test your colour mix on a piece of scrap metal or even just some paper. Resins can look different when wet compared to when they're fully cured, and this simple test can save you from a nasty surprise later.
Precise Application Techniques
This is where a steady hand makes all the difference. The aim is to fill the recessed area completely without letting the enamel spill over onto the surrounding metal. Remember, the clock starts ticking the second you mix the resin—you have a limited 'pot life' to work with, so be calm but efficient.
Pick up a small drop of your mixed black enamel on the tip of a clean toothpick. Touch the drop to the centre of the recess on the ring and let it flow outwards. Don't try to "paint" it on like you would with a brush; guide the resin and let surface tension do most of the work for you.
Add more small drops, one at a time, letting the enamel level itself out. This method helps prevent trapping air bubbles. If you do spot a bubble, you can often pop it by gently breathing on the surface (the warmth and moisture help) or by carefully teasing it out with the tip of your toothpick.
Fill the recess until the enamel is just slightly domed above the metal. This is called creating a meniscus. The resin shrinks a tiny bit as it cures, so this slight overfill ensures it ends up perfectly level with the metal for a smooth, professional finish.
Curing and Final Finishing
Once you’re happy with the application, the hardest part begins: leaving it alone. The piece must sit on a perfectly level surface to cure, completely undisturbed. Pop an overturned tub or box over it to protect it from dust.
Curing times vary by brand, but most resins are hard to the touch within 24 hours. To reach full chemical hardness, however, it can take up to 72 hours. Be patient. Resisting the urge to poke it is half the battle.
After it has fully cured, inspect your work. If any enamel crept over the metal edges, you can now carefully clean it up. Wrap a very fine-grit (1000 grit or higher) abrasive paper around a flat file and gently sand the excess away. Follow up with a jeweller's polishing cloth to bring the shine back to the metal, and your signet ring will look good as new.
Advanced Techniques For A Flawless Finish
Once you've got the hang of the basic application, a few advanced techniques can take your repair from looking 'good enough' to genuinely professional. These are the small details that create a seamless, invisible fix, especially on more intricate pieces. It's these final touches that truly separate the amateurs from the experts.
Often, you'll be working right next to gemstones. Protecting these stones from abrasive tools, solvents, and the epoxy itself is absolutely critical. Softer, more delicate stones like pearls, opals, and turquoise are particularly vulnerable and can be permanently damaged by a single stray drop of chemical.
Protecting Precious Gemstones
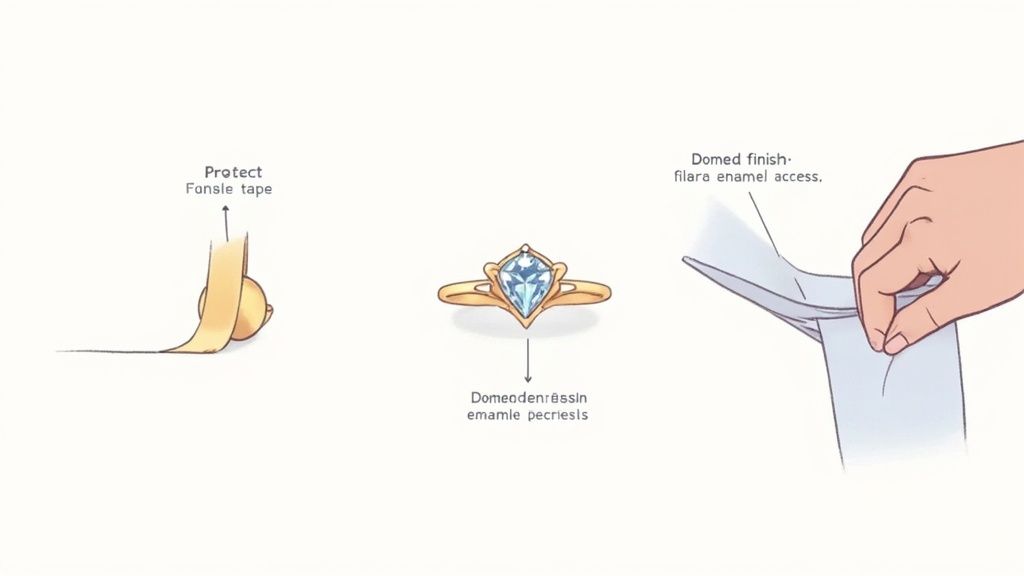
Before you even think about cleaning the metal, your first job is to mask off any nearby stones. A simple mistake here can be a very costly one. The goal is to create a barrier that’s tough enough to protect the stone but peels away cleanly without leaving any sticky residue behind.
Here are a couple of methods the pros use:
- Protective Wax or Film: Jewellers often turn to a special masking wax or a liquid film. You carefully paint it over the stone and its setting, let it dry, and it creates a tough, rubbery skin that you can just peel off once the enamel is fully cured.
- High-Quality Masking Tape: For stones with a flat surface, a precisely cut piece of quality painter's tape can work a treat. You'll need a sharp craft knife to trim it exactly to the stone's edge—the last thing you want is tape covering the metal you're trying to enamel.
Whichever method you choose, take your time. A rushed masking job is worse than not doing one at all. Make absolutely certain every part of the gemstone is covered, especially around the girdle where chemicals could easily seep underneath.
This level of care is standard practice in professional decorative work. Enamel coatings are a key part of the UK decorative coatings market, a sector valued at around USD 2.54 billion. While emulsion paints make up the bulk of that, enamel’s durability and high-end finish keep it essential for heritage and design projects where protecting original features is everything. You can read more about the UK decorative coatings market on grandviewresearch.com.
Achieving a Domed Finish
A flat, sunken enamel repair is an instant giveaway that it's an amateur job. Professionals aim for a subtle, convex dome known as a meniscus, where the enamel cures perfectly level with, or just a fraction of a millimetre above, the surrounding metal. This catches the light beautifully and gives the piece a finished, high-quality look.
The trick here is to slightly overfill the recess. As you apply the resin with your toothpick, add the final tiny drop right in the centre. Surface tension should pull the liquid into a gentle dome. It’s a delicate balance, though—too little and it will cure with a dip in the middle, but too much and it will spill over the sides, leaving you with a messy cleanup job.
Polishing for a Glass-Like Shine
Once your enamel has had plenty of time to fully cure—at least 72 hours—it's time for the final polish. This is the last step, and it’s what will blend your repair seamlessly with the rest of the piece.
You might need to start with some gentle wet sanding. If you have any tiny high spots or a bit of overflow, wrap a small piece of 1200-grit micro-mesh cloth around a flat cocktail stick. With a single drop of water, sand the enamel surface with very light, circular motions until it's perfectly level with the metal.
After sanding, the surface will look a bit dull. To bring back that high-gloss shine, use a quality polishing compound on a soft, lint-free cloth. Work the compound over the new enamel and the surrounding metal to buff away any fine scratches, bringing everything up to a brilliant, uniform shine. A proper polish can completely transform the final result, a skill we cover in our guide on how to polish a ring properly. This final buff is what makes the new enamel truly indistinguishable from the original.
Knowing When to Call in a Professional
Taking on a DIY re-enamelling project can be immensely satisfying, but knowing your limits is half the battle. While cold enamel is a brilliant solution for simple fixes, some pieces just demand the touch, tools, and experience of a professional jeweller. Pushing ahead on the wrong item can turn a tiny chip into irreversible damage, badly devaluing something you treasure.
Learning to spot the red flags is key. The moment you see one of these signs, it’s time to put the tools down and get an expert opinion. It’s always better than making a costly mistake.
High-Value Metals and Intricate Designs
The first big clue is the metal itself. If you're working with high-carat gold (18ct or higher) or platinum, you need a very delicate hand. These metals are surprisingly soft and can be easily scratched or dented by amateur filing and prep work. A professional has the fine control and specialised tools to work on these metals without causing harm.
Just as critical is the original enamel work. Does your piece have intricate patterns like champlevé (where enamel fills carved-out cells in the metal) or cloisonné (where tiny metal wires form the pattern)? If so, it is absolutely not a candidate for a DIY fix. These are traditional art forms that require years of skill. Trying to fill these delicate structures with epoxy resin will almost certainly destroy the original craftsmanship.
The Challenge of Heat-Sensitive Gemstones
Many beautiful enamelled pieces have gemstones set right next to or even within the enamel. This is a huge risk for any kind of repair. Stones like opals, pearls, turquoise, and emeralds are notoriously sensitive to chemicals and heat.
Even if you’re using a cold enamel, the solvents in cleaning agents or the resin itself can cause permanent clouding, discolouration, or damage. A professional jeweller knows exactly how to protect these delicate stones—or, if needed, can temporarily remove them from their settings. That's a task far beyond a home repair, and the risk of ruining a valuable gem is just too high.
When an item is an irreplaceable family heirloom or holds deep sentimental value, the choice is simple. The potential heartbreak of a failed repair far outweighs the satisfaction of doing it yourself. Professional care ensures it’s preserved for the next generation.
The demand for high-quality, durable finishes is growing. In the UK, the market for architectural and industrial coatings, which includes enamel products, is projected to hit USD 2.29 billion in 2025 and grow to USD 2.69 billion by 2030. This growth, driven partly by heritage restoration, shows how much value is placed on a professional-grade finish—a standard you should expect for your own jewellery. You can see more on these market trends at mordorintelligence.com.
The Professional Kiln-Fired Advantage
Ultimately, if you want a repair that truly matches the original vitreous enamel's hardness, shine, and longevity, only a professional can deliver that. At our Hatton Garden workshop, specialists use purpose-built kilns to fire powdered glass at temperatures over 800°C.
This process fuses the glass permanently to the metal, creating a true, lasting enamel finish that’s impossible to replicate at home. Trying to use a torch or any other heat source is not only ineffective—it's incredibly dangerous. For an authentic, durable result on any high-value item, professional jewellery restoration services are the only safe and reliable choice.
Got Questions About Re-Enamelling?
Even with a good guide, it’s natural to have a few questions before you get started. It's one thing to read instructions, and another to have a pot of mixed epoxy in front of you. Here are some of the most common queries we get from jewellery owners thinking of a DIY repair.
Can I Just Use Nail Varnish Instead of Proper Enamel?
It’s a tempting thought, especially for a tiny chip, but the answer is a firm no. While it might look okay for a day, nail varnish simply isn't made to bond with metal for the long term. It doesn't have the durability or the adhesive strength of a two-part epoxy.
You'll find it chips, peels, or flakes away almost immediately, particularly on a ring or bracelet that sees daily action. It also lacks the hard, glossy finish of real enamel and can look cheap up close. For a repair that actually lasts, you need a proper cold enamel kit.
How Long Does a Cold Enamel Repair Really Last?
When it’s done right, a cold enamel fix can last for years. Its lifespan really comes down to two things: how well you prepared the surface and the kind of wear the piece gets. If the metal was properly cleaned and keyed (scuffed up) to give the resin something to grip onto, the bond will be surprisingly strong.
On something like a brooch or a pair of earrings, that repair could last indefinitely. On a ring you wear every day, it might start to show fine scratches after a few years of knocks. It’s much tougher than people think, but it’s not as hard as traditional kiln-fired glass enamel.
The key thing to remember is that cold enamel is a durable, semi-permanent repair. It's very resilient but not indestructible. Keep your repaired piece away from harsh chemicals and heavy impacts, and you'll dramatically extend its life.
What if I Mess Up the Application?
First off, don't panic! If the epoxy is still wet, you have a short window to clean it up. A cotton bud dipped in a little isopropyl alcohol is perfect for wiping away spills or overfills. Just be quick and careful to avoid smearing it.
If the resin has already started to go tacky, trying to wipe it will only make things worse. At that stage, your best bet is to just let it cure completely. Once it’s rock solid (give it a full 72 hours), you can carefully sand or file away the mistake and start that section again. It takes more time, but it’s always fixable.
If you’re looking at a complicated repair, or the piece is valuable or deeply sentimental, a DIY job might not be worth the risk. For a guaranteed professional finish that protects your jewellery, it’s best to trust an expert.
At Opulence Jewellery Services, our Hatton Garden specialists can restore your enamel with the precision and care it deserves. Learn more about our expert jewellery repair services online or get in touch for a quote.